Get Started
In this documentation we gonna learn what is ClickForHelp Support and why should we use it, also how to configure settings,
plus structure of script with some screenshot to understand it well.
Just read the Doc and chilling!
Why click for help ?
First of all let's started with the problematic, an application that lacking of the support side or even if has a one, when the app breakdown
automatically support side brokendown... That is not the problem, the problem's how can the user share with developer
the problem that he got into, i mean how can a user share the specific error that he receive with description and in the other side the developer know who send the error and kind of the error ?
So click for help support is a simple tool come with a solution that makes the user never touch any device before, with just one click of the cfh button,
you can share the error as a screenshot picture with some description if he wants to describe the error, all of these things in a short time,
you can also use it in case that a user don't undrestand how the system works and then he communicate with the developer to solve the problem.
So the concept of cfh is to save time by triggering cfh button in the bug event which is
like support and which facilitates communication between a user and a developer.
Let's not talk too much in abstraction and starting learning how script works and how can we work with.
Structure of script
I- Requirements CDN.
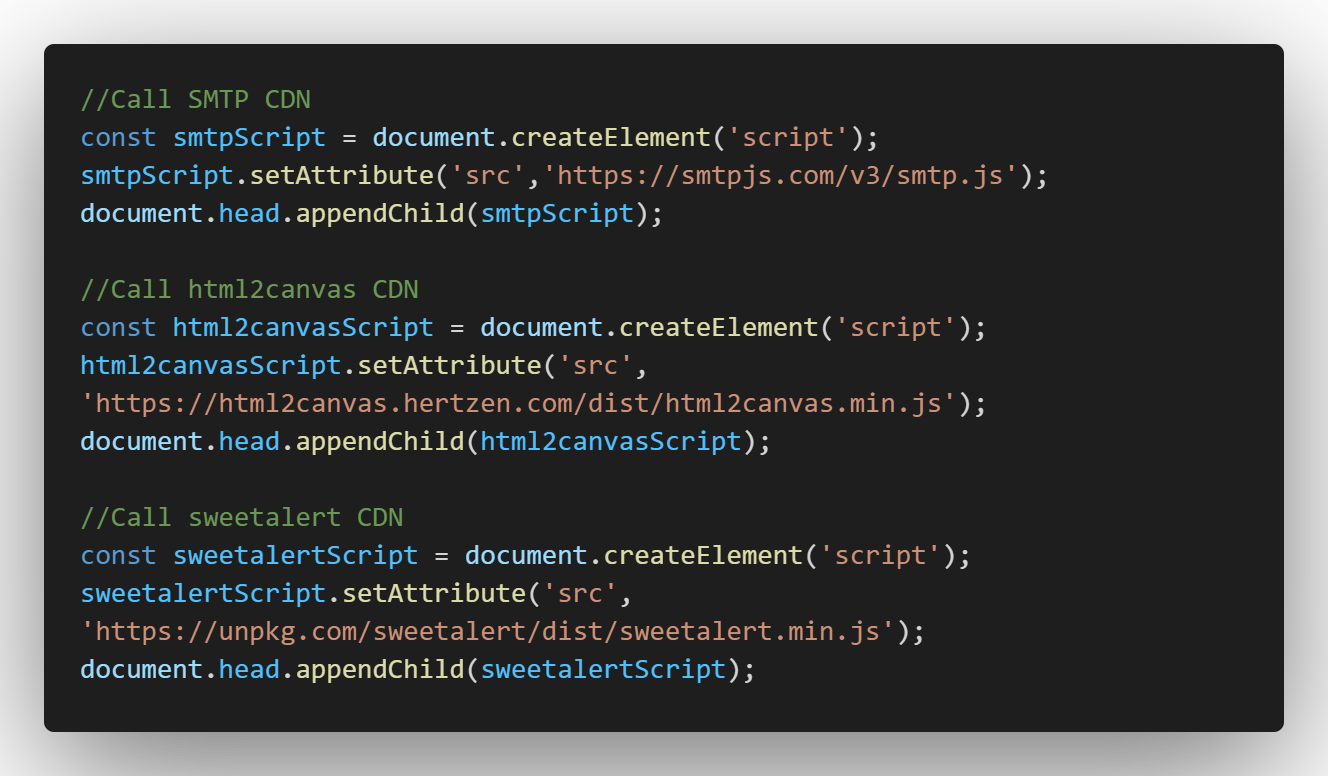
In early versions i was just using APIs browser to get a screenshot of current tab and put him in canvas and convert it to image based 64 and the rest's pure code javascript but he was look too long and ugly and after that i thought to use a exsting libary which did same work, and i found html2canvas
if you wanna learn about it here is the link html2canvas.hertzen.com
The same thing with Sweet Alert is a way to customize responsive alerts in your websites. It allows you to change from a standard JavaScript button.
if you wanna learn about it here is the link sweetalert.js.org/
And finally SMTP Protocol to send the mail.
II- Create Button with DOM API.
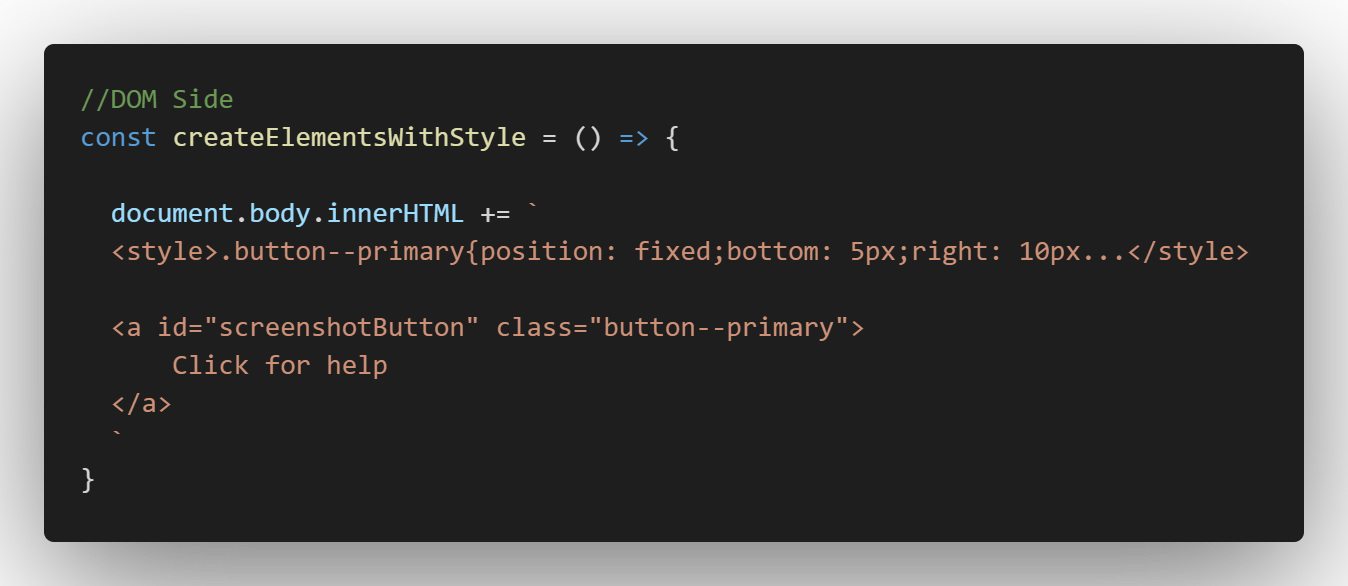
As you see i create a button with basic style using Document object model browser API.
You can remplace with any button you want just you must should keeping Id name screenshotButton and a part of style which makes the button located directly in the bottom right of the page.
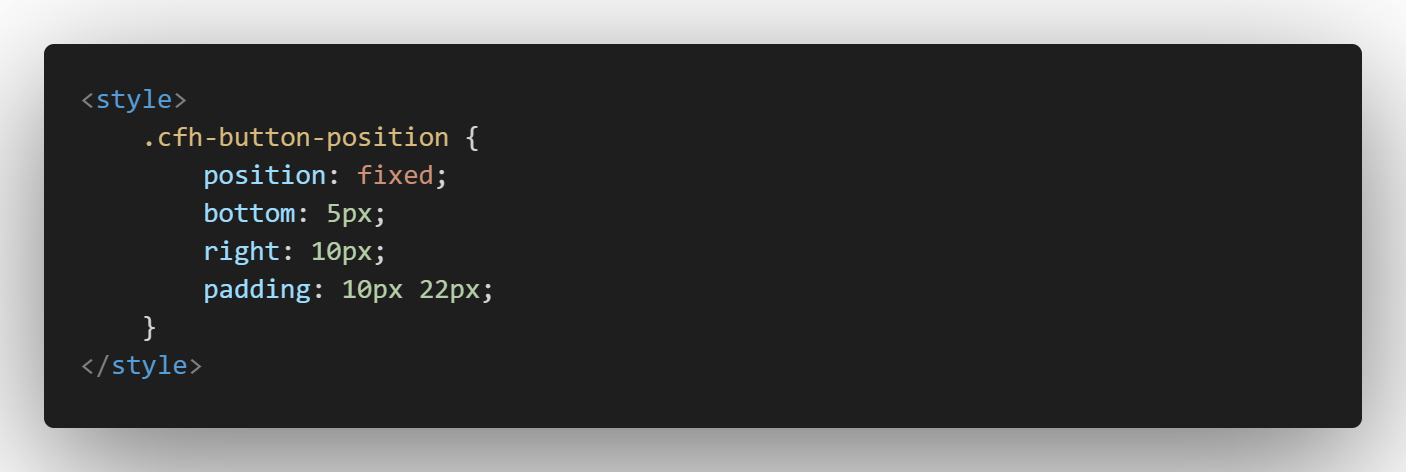
Here is the style code:
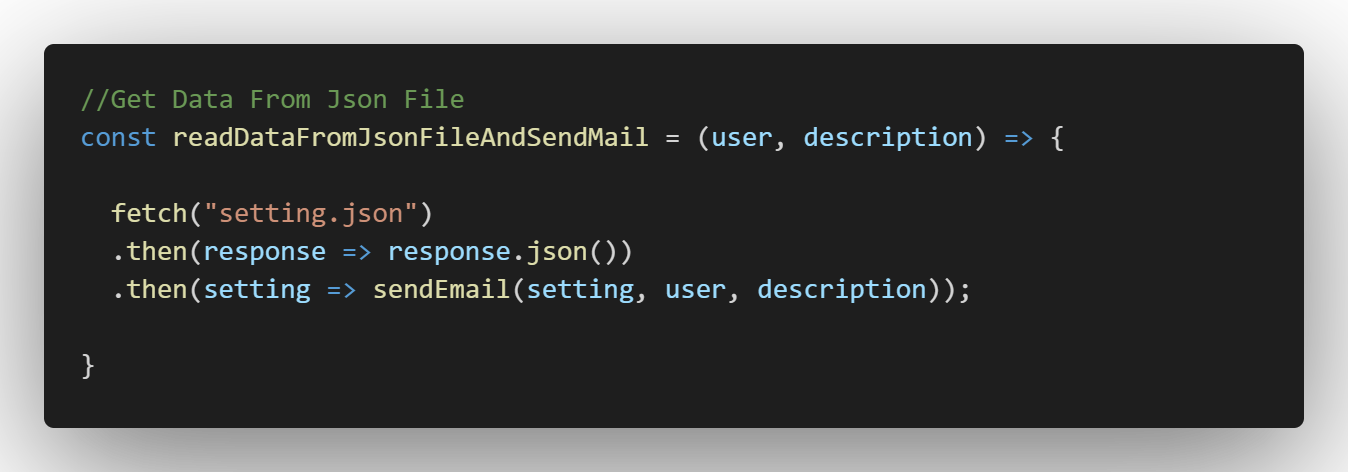
III- Load data from setting file.
                $ click for help  ——setting
                  {
                    “Username” : “click for help support”,
                    “Password” : *****************,
                    “To” : “user.receiver@email.com”,
                    “From” : “support.clickforhelp@email.com”,
                    “Subject” : “Click for help support”,
                    “Description” : “Hello i send to you this message just for testing the smtp protocol thank you.”
                  }
I used Fetch API [ promise-based JavaScript API for making asynchronous HTTP requests in the browser similar to XMLHttpRequest (XHR) ] to load the data from setting file and this data i use it to handle SMTP protocol the file has the username and email, receiver and content of message i mean the description and after load data... I use it in the sendMail function (we gonna see how it's work ...)
And There is another way to handle SMTP protocol without using setting file, by implement required attribute inside script tag, and make sure that you put cfh value in id attribute on script tag :
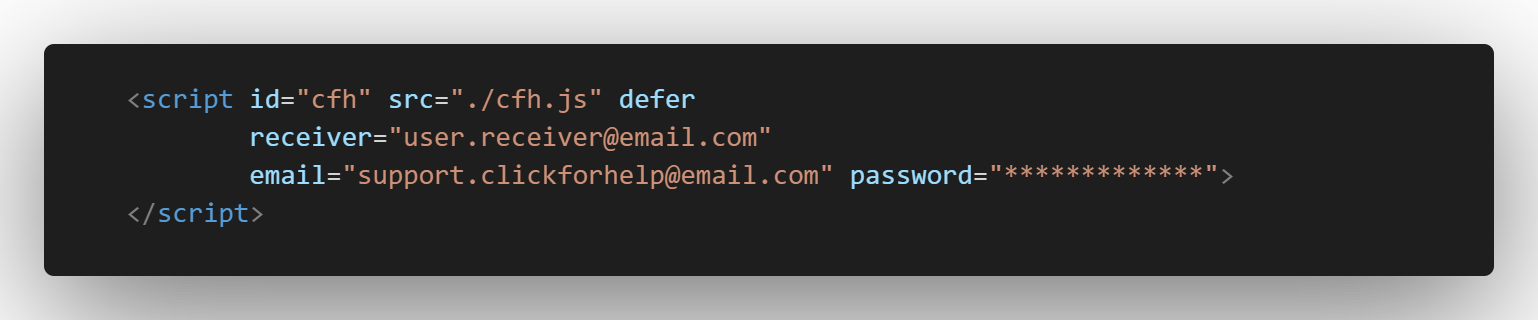
As you see here we used destructuring object to get params from cfh script.

IV- Take a ScreenShot.
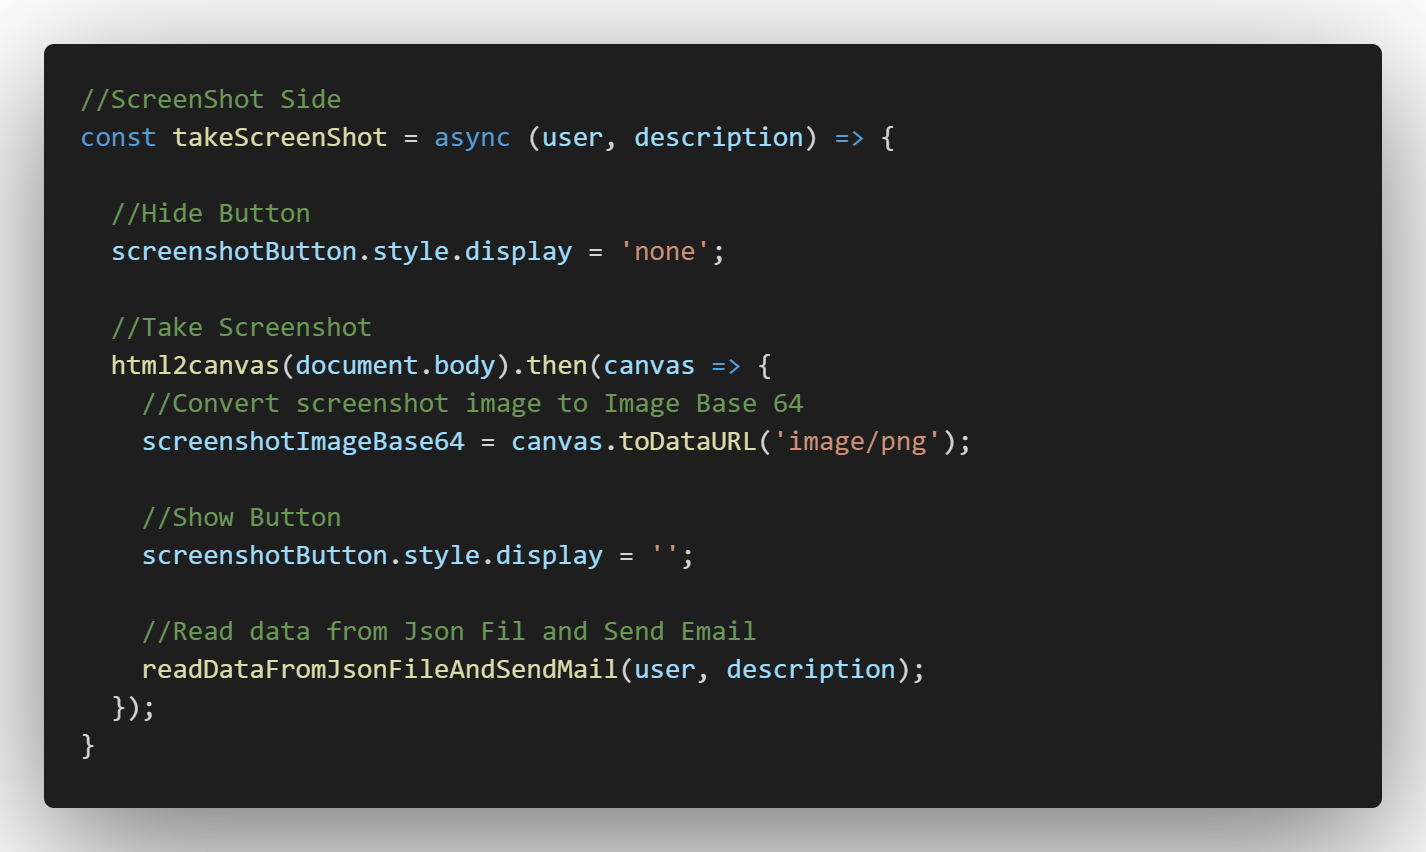
takeScreenshot is an asynchronous function that receive two arguments(user, description) which coming from sweetAlert response (pop-up).
We go through three basic steps :
- Hide and show the cfh-button.
- Take the screenshot of web page and stock it in global variable (screenshotImageBase64)
- Read data from setting file and send the mail
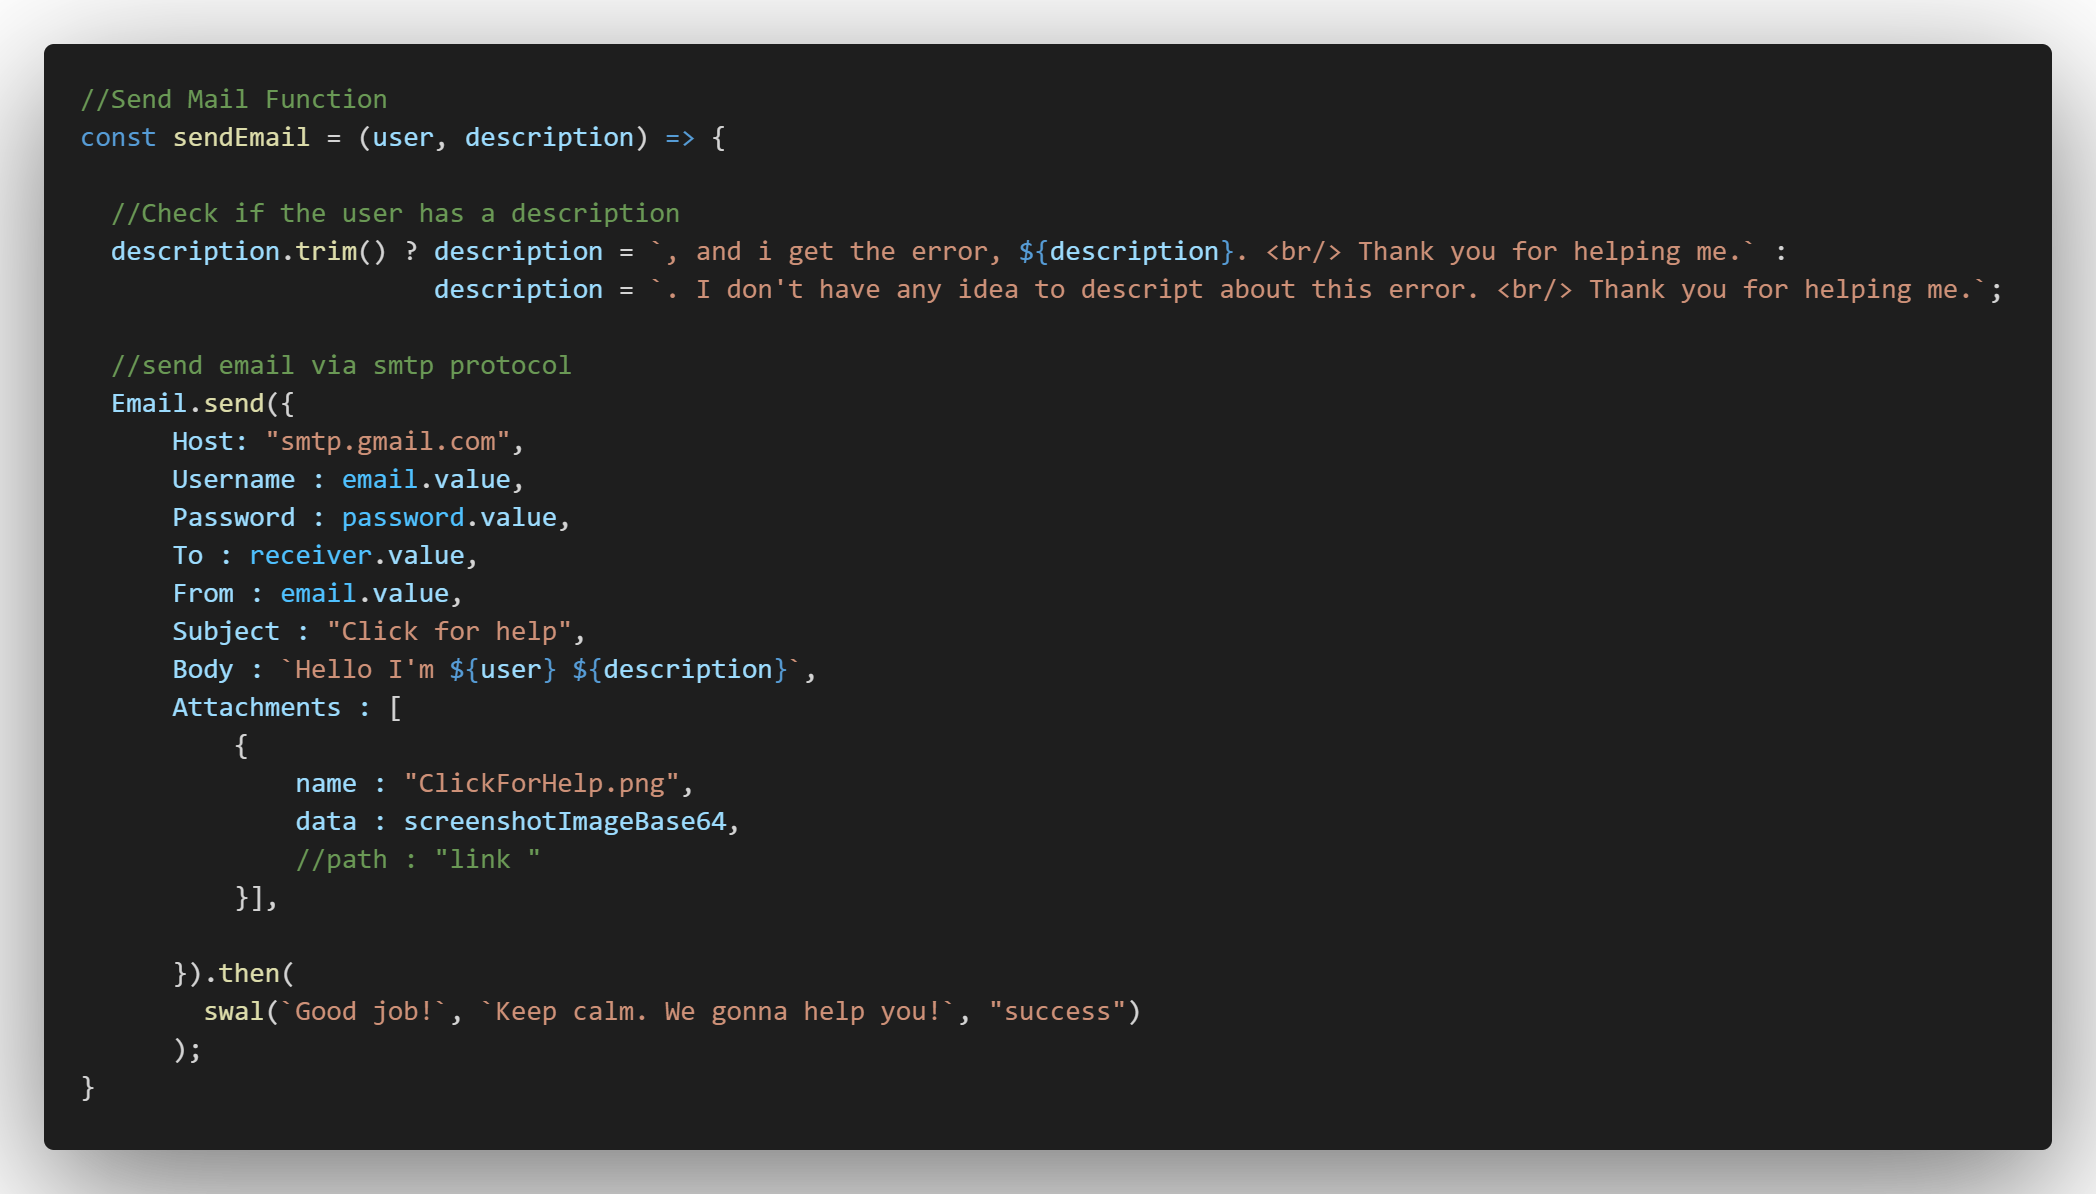
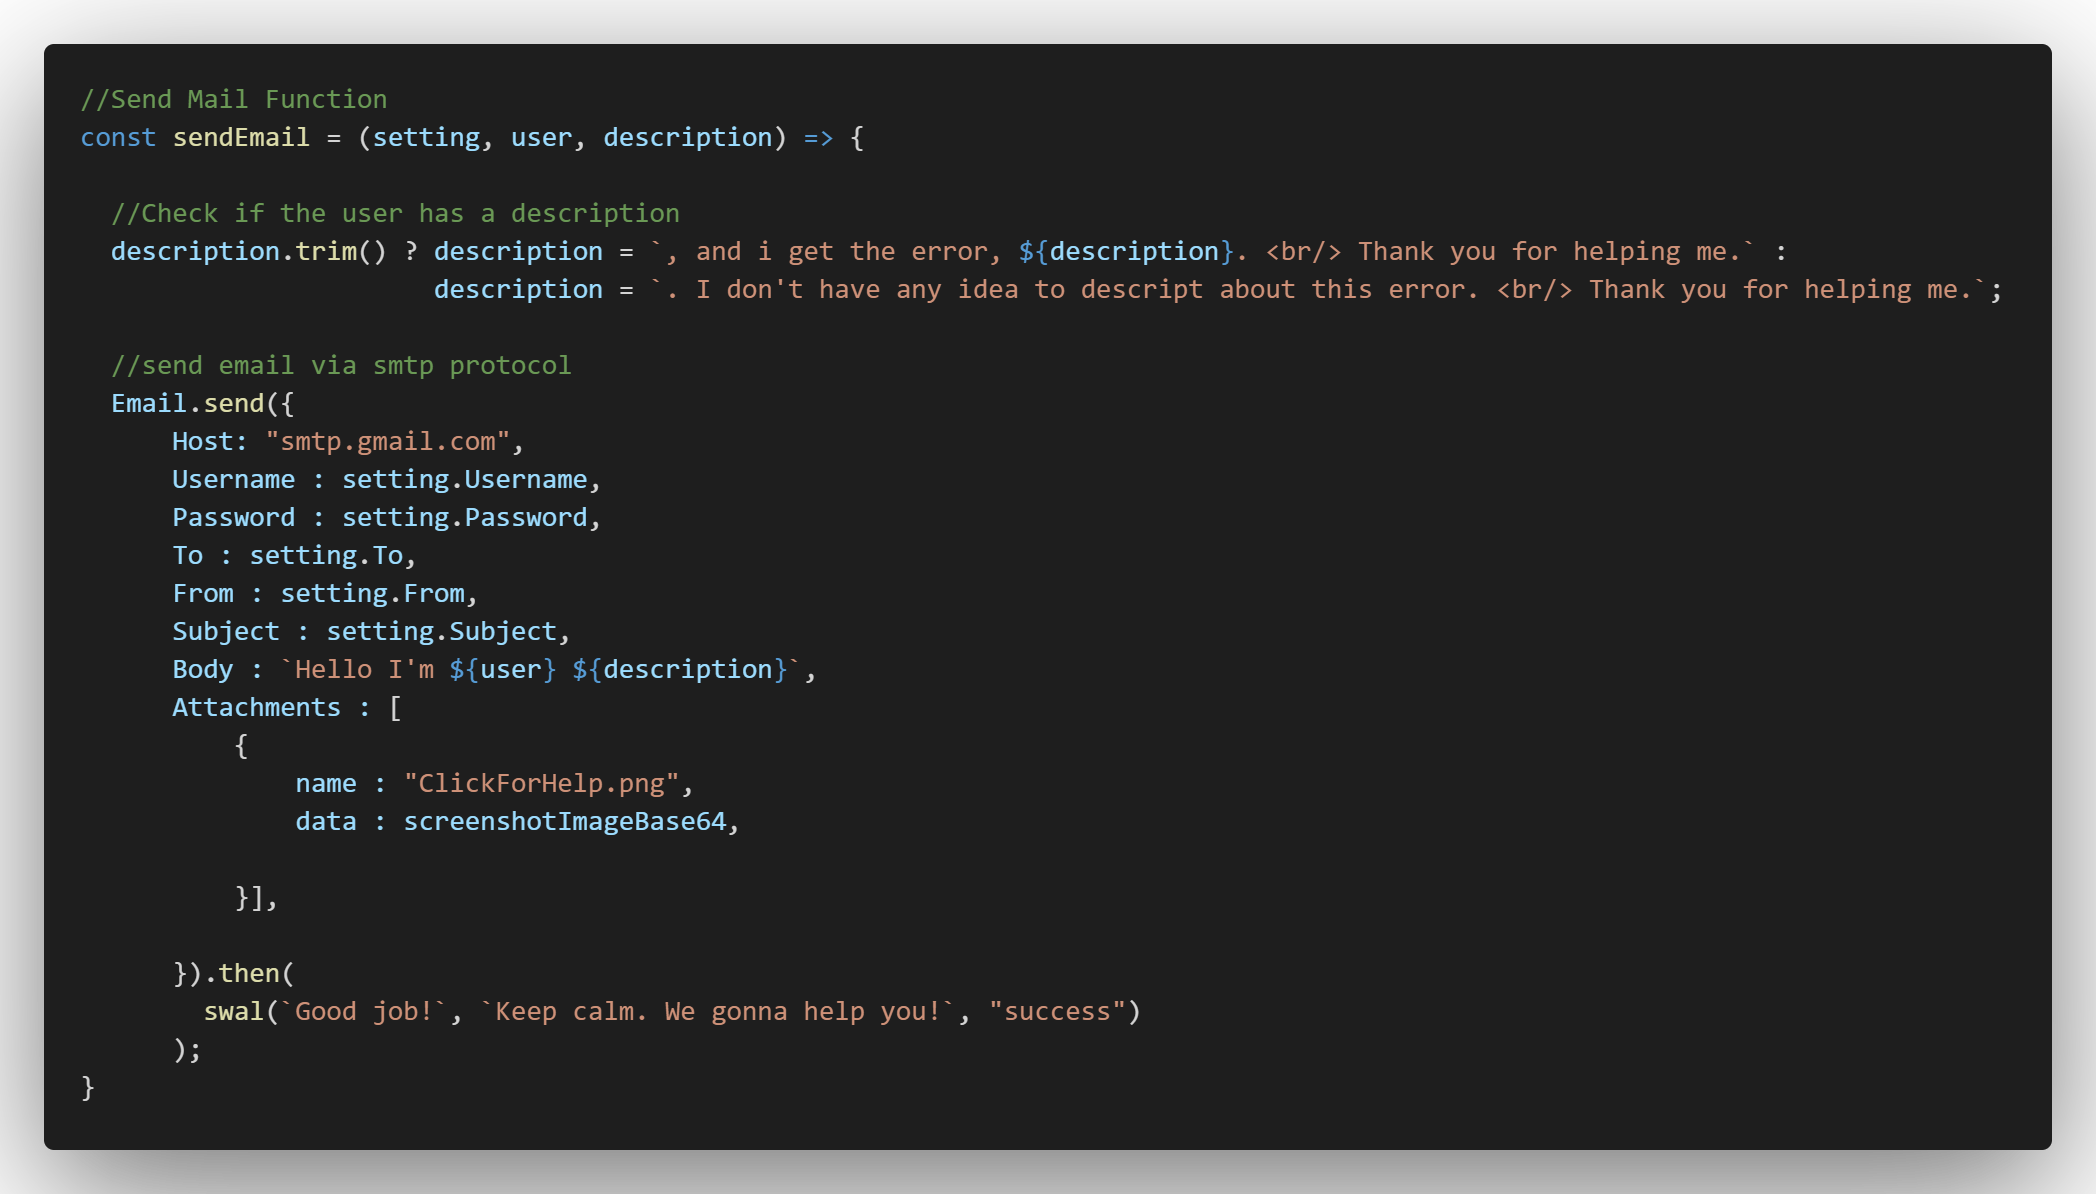
V- Send data to a specific Email.
In sendMail function we handle smtp protocol by setting file or script attribute as you see in screenshots of code.
And then... after passing the mail and screenshot taking process with success we show a success message box !
VI- Set username and describe the error (optional)
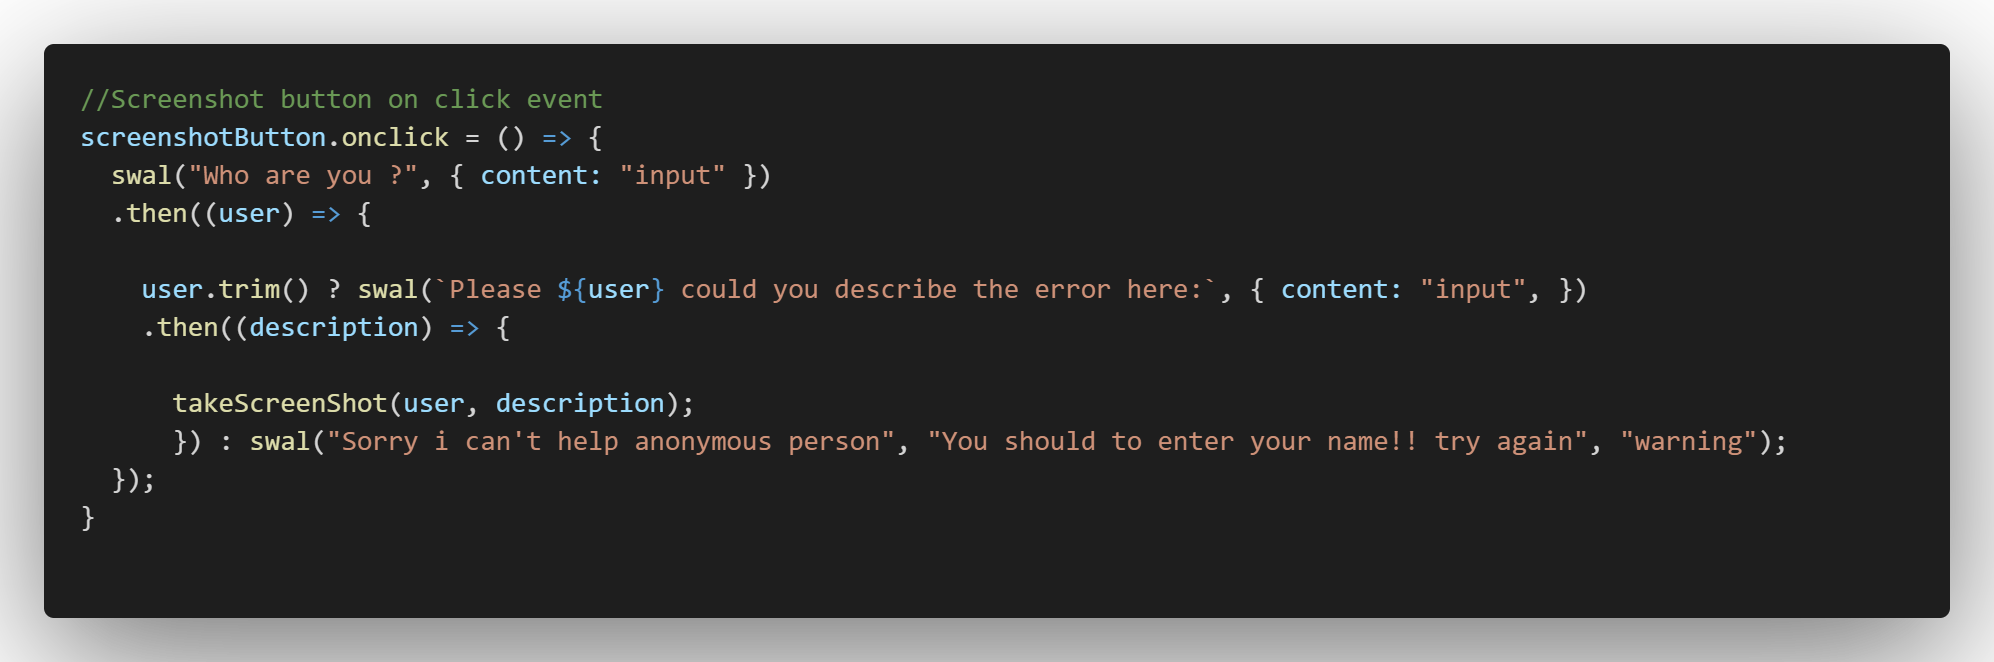
And finally in cfh-button onclick event, we call takeScreenshot function after getting username and description by swwetAlert, and then... if the user doesn't print here name we display a warning message box !
Installation
After download the script or calling the cdn:
Put the script in the head body tag:
                <script src="cfh.js" defer></script>

OR

                <script id="cfh" src="cfh.js" defer
                        receiver="receiver@email.com"
                        email="support.clickforhelp@gmail.com" password="*************">
                </script>
Or put it after the body tag:
                 </body>
                <script src="cfh.js" ></script>

OR

                 </body>
                <script id="cfh" src="cfh.js"
                        receiver="receiver@email.com"
                        email="support.clickforhelp@gmail.com" password="*************">
                </script>
Keybindings
- Show or hide click for help button Ctrl+Alt+H H means Help !
- We gonna see another keybindings in next versions Comming soon!
Actions Keybindings
Best practices
We know that JavaScript is a front-end language and this means that any user can see your code through the browser, so the problem here is when configuring the smtp protocol, any user can access your email data even if you place the file locally. So if you are going to use this tool in the back office side or your application is local that is fine...
Finally we gonna soon fix this problem in a reasonable way making this script more secure.